
In part Two of the article about Using ArcGIS ArcMaps for analysing property locations, we will follow up on what we learned in the last article. We will this time focus on adding some data intellegence, and will do some calculations to determine which properties are within a certain distance of the road that we centered on previously.
The first step to accomplish is to set the locations on your network in which you want to enable your search. This is done by adding a location and creating an index of the tools and data available.
To do this, click the Index / Search Options button in the search tab (click search in the right margin) and in the dialog box that appears, confirm that the Index tab is selected. Then click Add.
In the Browse Folders to be Indexed dialog box, click the Go To Home Folder button, click the City geodatabase, then click Select.
Finally, locate the Index / Search Options dialog box, and at the bottom of the dialog, click Index New Items. This will cause ArcGIS to build an index of data and tools located within the UsingArcMap10 folder. The index will take a few moments to create.
You can watch the progress of the indexing in the Indexing Status section of the Index / Search Options window. When the Indexing Status is set to Active, the new index is built and ready for search, so click OK. In the Search Window, click the Data link. This will allow you to restrict your search to the data you want.
In the Search window, enter the search term: parcels
This will return a list of data that contain the term parcels. The one we are interested in is named: Parcels (File Geodatabase Feature Class) and has a path that contains \student\usingarcmap10_0\city.gdb\parcels.
Drag the Parcels data onto your map. You will now see the Parcels layer added to your map and the table of contents.
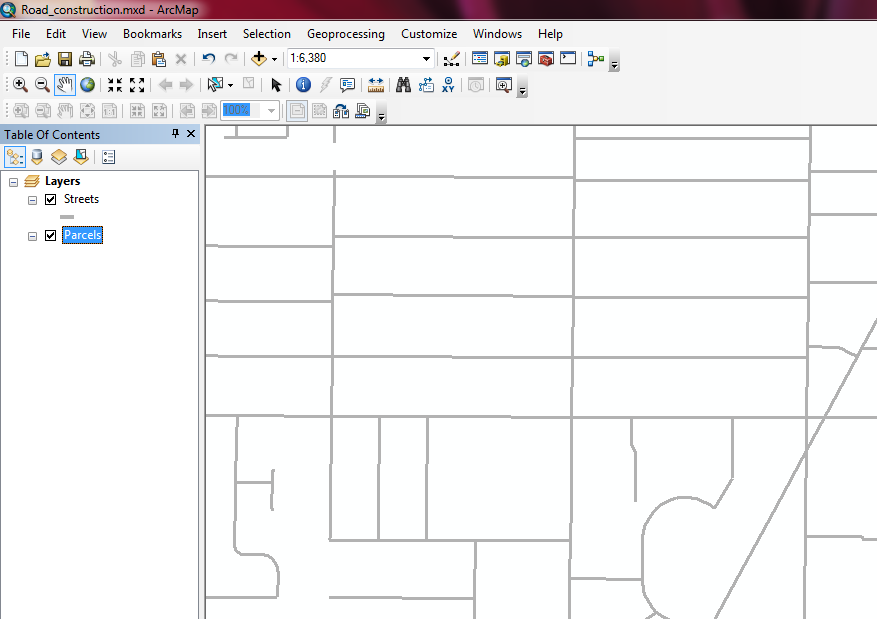
Notice the Parcels layer is now listed in the left table of contents.
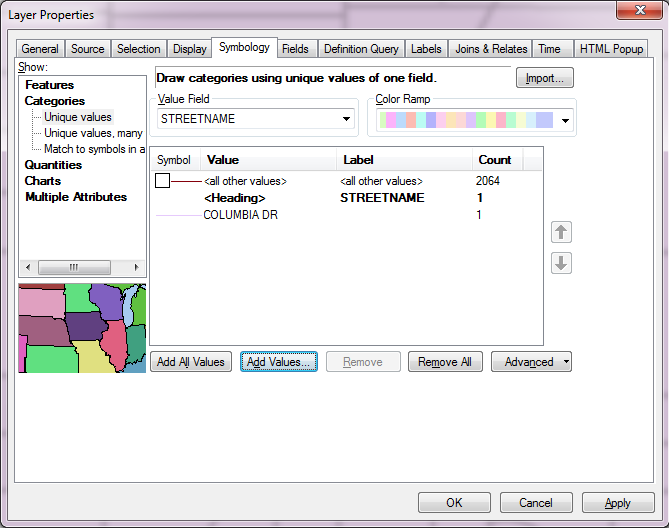
In the table of contents, right-click the Streets layer and choose Properties, and click the Symbology tab.
On the left side of the dialog box, under Show, click Categories, and confirm that Unique Values is selected. Under Value Field, confirm that STREETNAME is selected.
At the bottom of the dialog box, click Add Values. In the Add Values dialog box, click Complete List. Scroll down the list of street names and click COLUMBIA DR, and then click OK. You now have two categories of features, COLUMBIA DR and <all other values>. Uncheck the box next to <all other values> and the screen will look as follows:
Now you will use the Symbol Selector to symbolize the road segment, so that it is clearly visible on the map as “under construction”. Click OK to close the Layer Properties and (In the table of contents) click the symbol next to COLUMBIA DR. The Symbol Selector will appear, which enables you to change the symbol for COLUMBIA DR.
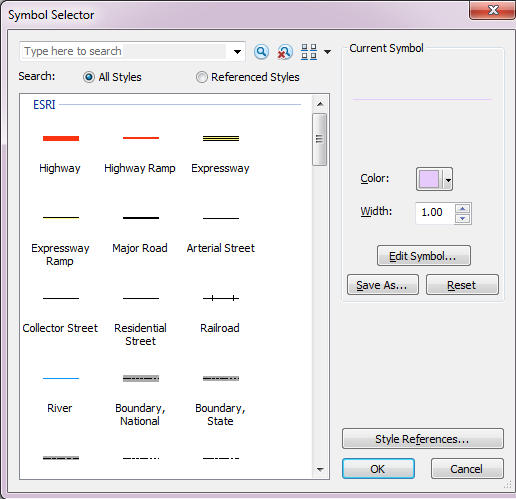
In the Search field at the top of this dialog, type the word repair and click the Search button. Two symbols will be listed in the search results, click the one with the double line, as it is easier to see. In the Symbol Selector, do the following: Click the down arrow next to the color patch and choose a red color, and set the Width to 0.8, then click OK to close the dialog.
Once you have set the street symbol, you will see the following:
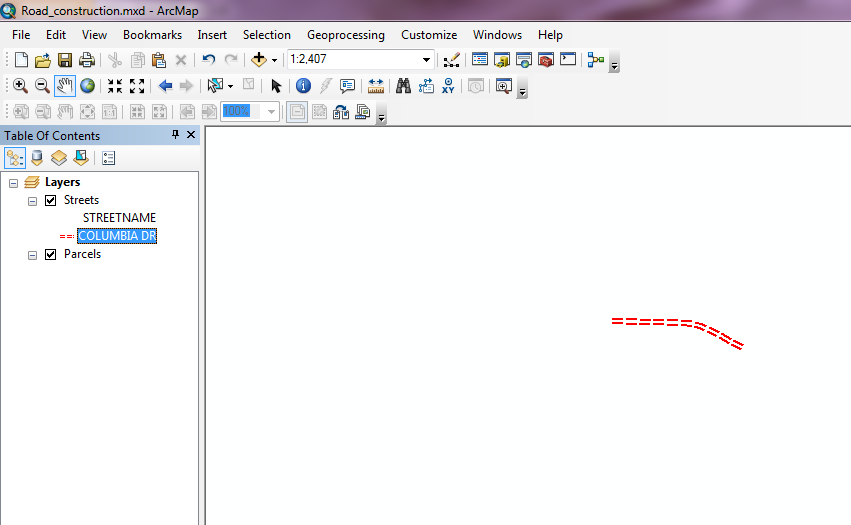
Now We are ready to select the properties which are located within a predefined distance from this road, which we will complete in part 3 of this walkthrough.